 If your website is built on WordPress, then you have the ability to edit content, create/delete pages, update the menu, change the sidebar, and many other tasks.
We want your website to work for you, and the best way for that to happen is if you know how to manage your website. WordPress is both seriously powerful, and seriously simple.
We’ll cover a few basic tasks here – and the WordPress system is pretty intuitive, so you should be able to figure out how to do most things. If you would prefer to watch a video on how to use WordPress, you can do so here. If you have trouble, we’re only a phone call away!
 Logging into WordPress
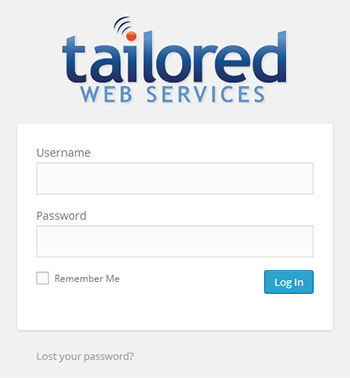
Your website has a password-protected admin area, so that you can make changes to your site. Your first task will be to log in to WordPress.
You can type your homepage address into your address bar, and add /wp-admin/ to the end. Or, you can probably click on an “admin” link at the bottom of your homepage.
You should see a login screen similar to this. Simply enter the username and password we have provided you with, and click the “Log In” button.
If you have lost your password, you can contact us for a reset. Or, you can use the “Lost your password?” tool below the form. This will initiate a password reset without you having to wait for us.
 Getting Orientated with WordPress
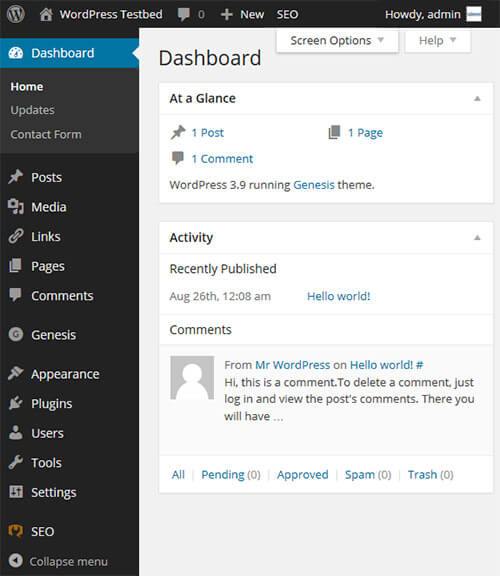
Once you’ve logged in, you should see the WordPress Dashboard. This is an overview of your site – you can see some information, such as how many posts you’ve made, how many pages you have, and a list of any recent comments on your blog.
To the left, you’ll see the navigation menu. We’ll refer to this a lot. There’s a lot of options in the admin area, and this menu is how you’ll find your way around.
There’s also a toolbar along the top of the page, which will have some shortcuts you might find helpful. You can easily create a new page, or see if software updates are available. This top toolbar will be present when you’re looking at your public website too, as long as you’re logged in to the admin area.
The admin area will look different depending on the size of your screen, and whether you’re using a mobile device or tablet. The layout will adapt itself to best suit the available screen size, so you can even manage your website from your phone’s browser.
The admin area may also have different information/options displayed, depending on the plugins you have installed.
 The Content Editor
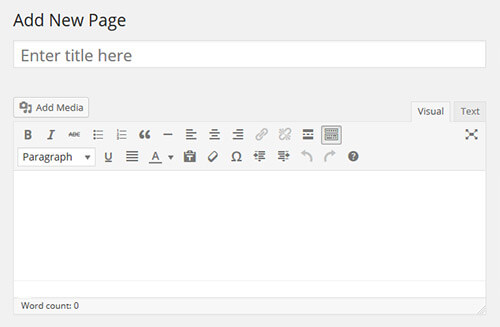
This user-friendly interface is how you’ll edit content in WordPress. You’ll find it easy to add content, links and images to your website. We’ll give you a brief tour now.
The Title is the primary heading for this page. It’s also helpful for SEO purposes.
Below that is the Add Media button. You can click this to insert an image at the cursor position, or to embed a gallery of images.
Over to the right are two tabs, to switch between Visual and Text mode. Generally, you will want to be in Visual mode. Text mode allows for code editing, which we don’t recommend unless you know what you’re doing.

The toolbar will look familiar if you’ve used Microsoft Word or other text editors, and most of these buttons shouldn’t need explanation. You can make things bold, or set up bullet points, etc.
The right-most icon in the top row is called “Hide/Show Kitchen Sink”. Clicking this will hide/show the additional rows of icons. There may be more than two rows, depending on the custom functionality of your site.
Handy Editing Tips
If you open the editor and see strange tags, with lots of <p>tags like this</p>, then you probably have the editor in Text mode. Check the Visual/Text tabs at the top, and change back to Visual mode.
![]() Pasting content from Word documents can sometimes be a problem. This has recently gotten better, but if you paste content and it looks strange, try using the “Paste as text” button (pictured right).
Pasting content from Word documents can sometimes be a problem. This has recently gotten better, but if you paste content and it looks strange, try using the “Paste as text” button (pictured right).
 Adding Images to your Content
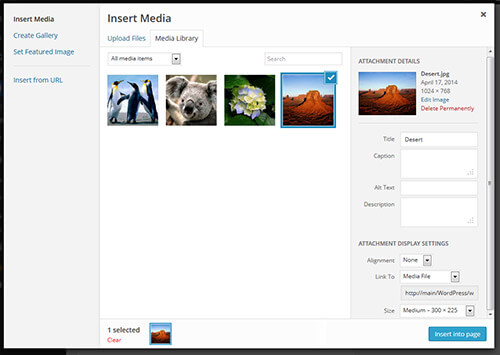
To insert an image, first place the cursor at the position you want the image, then click the  button. This will pop-up the “Insert Media” window, which lets you upload new images or view your existing media library.
You can go to the “Upload Files” tab and browse for images to upload, or you can drag image files into this window from My Computer.
Then select which image you want to insert, and click on it. You’ll see the “Details” screen to the right, and you can set image options, then click the blue “Insert” button.
Tip: When you want to insert an image, first put the cursor at the starting point for that image. The image will appear wherever the cursor is located.
Tip: If you’re going to Left Align or Right Align an image, then the text will flow around the image (similar to most images on this page). It helps to put the cursor at the start of the paragaph/heading when you insert images like this.
Tip: You can also insert an Image Gallery instead of a single image. Try it out and see! (Typically, set the “Link To” option to “Media File”)
 Saving Your Work
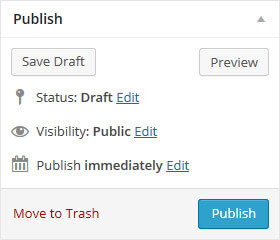
If you’re not quite ready to put your masterpiece out there for the world to see, you can click the “Save Draft” button to the right of the editor. Your work will be saved as a draft, which means it is not open the public.
When you’re ready to publish your work, click the “Publish” button. It’s always a good idea to preview your page before your publish it, just to ensure that everything looks right.
You can also schedule a page or post to be published in the future by changing that “Publish Immediately” value to a date/time in the future. Your update will be automatically published at that time.
 Managing your Menu
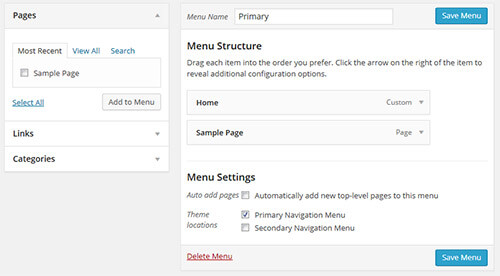
Editing the menu is very simple. Look under the Appearance menu for “Menus”.
You’ll see your existing menu, and you can drag-and-drop elements to change the structure. You can change the order, and if you drag to an indented position, it will create a drop-down menu. You can click the down arrow to expand a box, and change certain options such as the label (name) of the menu item.
To the left are boxes for Pages, Posts, and other types of content. You can use these to add links to your menu. If you create a new page, it will appear in the “Pages” box. Then you can just tick it, and click the “Add to Menu” button. Then drag to the desired position, and save your menu.
And remember to view your site after you change the menu, to ensure that everything works as expected.
 Changing your Sidebar
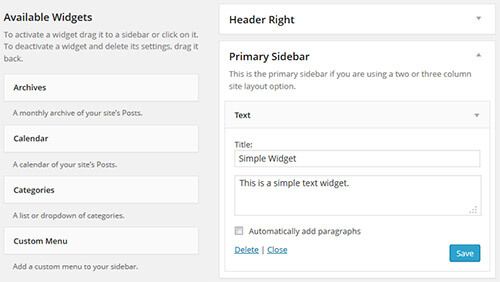
Your sidebar is called a Widget Area. Widgets are just things we add to the sidebar area. Some widgets are simple text, and some are more advanced with options you can set.
Look under the Appearance menu for “Widgets” to find this area. Your site might have a number of areas configured – this will be shown on the right. The list of available widgets will be shown on the left. You can click-and-drag to get widgets to the desired position and order.
As always, you can click the down arrow beside a widget area or widget box to expand it. When you expand a widget, you’ll be able to set content or change options, depending on the widget.
We will pre-configure a number of widgets for you when we first launch your site, but you can always add more. Note that some widgets might look strange when you first add them. If this happens, please let us know. We may need to tweak your website theme to properly support certain widgets.
 Managing the Shop and Orders
This section only applies if your website has a built-in shop using WooCommerce.
When a customer places an order, you will receive a notification email. You can also retrieve full order details by logging into your website admin area, and clicking on “WooCommerce”. This will show you a list of recent orders, which you can click on to see more information. This is also where you go to view sales reports. Read more…
If you click on “Products” in the left menu, you can manage products just like products or pages. You can add products, or put them in categories. Editing a product will look very similar to editing a page. However, you’ll also see a box titled “Product Data”. This is where you configure pricing, or product-specific shipping, and a number of other options. Read more…
